 +86-0573-88528475
 English
 русский
Search by posts
Product category
Industry News
 By Admin
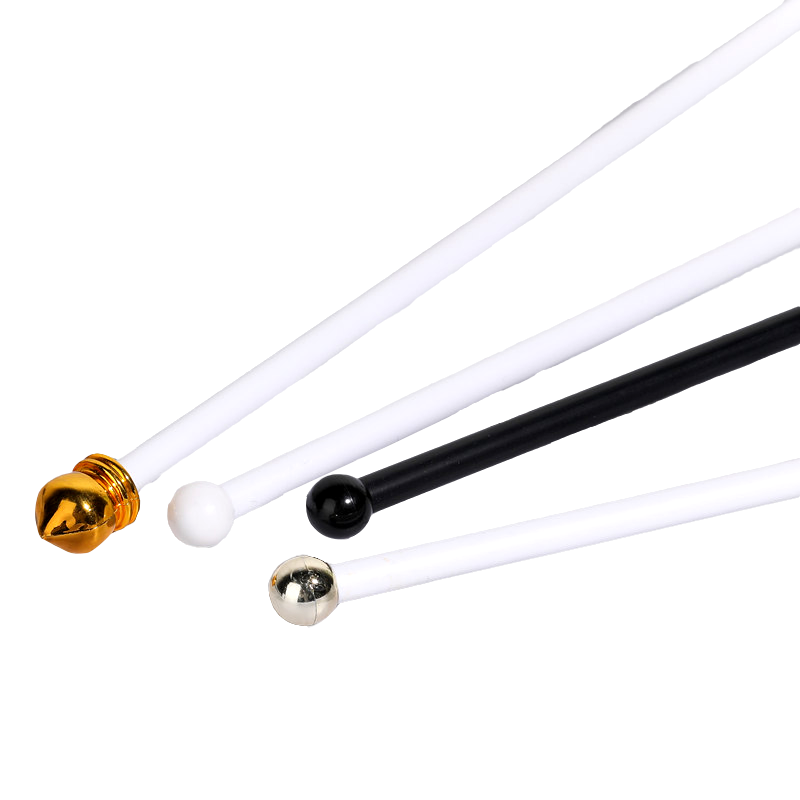
Flagpole Ball Explained + How to Put Up a Flagpole
Content The ball sitting at the top of a flagpole is called a truck or a finial. It is not purely decorative — it serves a functional purpose by capping the pole to prevent water from entering the hollow shaft, which would cause internal corrosion or wood rot over time. At the same time, it provides a polished, finished appearance and acts as the anchor point through which the halyard (the rope used to raise and lower the flag) is threaded or routed via an internal pulley system. Most flagpole balls are made from aluminum, cast bronze, or weather-resistant plastic, and are sized proportionally to the pole diameter — typically ranging from 3 inches in diameter for residential poles to 8 inches or larger for commercial and institutional flagpoles. Gold-colored finishes are the most traditional, though polished aluminum and painted finishes are common alternatives. On internal halyard flagpoles — the most common type for commercial and government installations — the truck contains a cast pulley system that allows the rope to run inside the pole rather than on the outside. This protects the halyard from weather, vandalism, and wear, and gives the pole a cleaner visual profile. On external halyard poles, the truck is simpler: it may house a single pulley or cleat attachment point, with the rope running down the outside of the shaft. These are more common in residential settings due to their lower cost and easier DIY installation. Regardless of halyard type, the truck must be securely threaded with the halyard before the flagpole is erected — accessing it after installation requires lowering the entire pole or using a lift, which is why pre-threading the halyard through the truck before raising is a critical installation step. Selecting the correct ball size is both a practical and aesthetic decision. A ball that is too small looks lost atop a tall pole; one that is too large looks top-heavy and can create additional wind load stress on the upper shaft. Most manufacturers supply a matching truck with their flagpoles, but replacement trucks and finials are widely available as standalone parts. When replacing a worn or damaged ball, always match the thread size of the pole's top spindle — common thread sizes are 1/2-inch and 3/4-inch male threads, though this varies by manufacturer. Installing a flagpole is a manageable project for most homeowners if the pole is under 25 feet. Taller poles — particularly those 30 feet and above — typically require professional installation due to the weight, ground foundation requirements, and erection equipment involved. Here is the full process for a standard residential in-ground aluminum flagpole. Before digging, call your local utility locate service (811 in the United States) at least 48–72 hours in advance. Underground gas, water, and electrical lines must be identified and avoided. Choose a location with clear overhead space — the pole should be placed well away from overhead power lines, with a safe fall distance in every direction equal to at least the pole's full height. Most residential flagpoles use a ground sleeve (also called a foundation tube) set in concrete, rather than the pole itself being buried directly. The hole depth should be approximately 10% of the pole height plus 2 feet — for a 20-foot pole, that means a hole roughly 4 feet deep. Diameter should be at least three times the sleeve diameter to allow adequate concrete coverage. Set the sleeve vertically in the center of the hole, check it with a level, and brace it in position before pouring concrete. Allow concrete to cure for a minimum of 48–72 hours before inserting and raising the pole — premature loading is one of the most common installation mistakes. Multi-section poles ship in two or three pieces that telescope or butt-join together. Assemble them on the ground before raising. This is also the stage to: For poles up to 20–25 feet, raising can be accomplished by hand with 3–4 people. One person guides the base into the ground sleeve while others walk the pole upright from the top end. Never stand directly under the pole during raising. For heavier or taller poles, a gin pole (a short lifting arm attached to the pole near its base) can provide mechanical advantage to reduce the required lifting force. Once vertical, check the pole for plumb with a level on two sides before inserting the base plug or locking the ground sleeve cover. Minor adjustments are possible by shimming the base of the sleeve before it is fully locked. Clip the flag's grommets to the snap hooks on the halyard — the top grommet to the upper snap hook, the bottom grommet to the lower. Raise the flag fully, then lower it to confirm the pulley in the truck is running smoothly and the rope is not twisted. Cleat or lock the halyard at the base once the flag is at full height. The foundation is the most structurally critical part of any flagpole installation. Undersized foundations are the primary cause of flagpole leaning or toppling in high winds. The following guidelines apply to standard aluminum poles in average soil conditions — sandy or loose soils require deeper and wider footings. This is one of the most important decisions when selecting and installing a flagpole, as it affects both day-to-day usability and long-term maintenance. The rope runs on the outside of the pole through a pulley in the truck, and ties off to a cleat mounted on the shaft. These are less expensive, easier to install and service, and the most common choice for residential properties. The downside is that the rope is exposed to weather and potential tampering, and the hardware noise (rope slapping the pole in wind) can be noticeable. The rope runs entirely inside the pole, accessed through a locked door at the base. The truck at the top contains a sealed pulley system. Internal halyard systems are the standard for commercial, municipal, and government installations because they prevent unauthorized lowering of the flag, protect the rope from UV degradation, and eliminate rope-slap noise. They cost significantly more — typically $300–$800 more than comparable external halyard poles — but require far less rope maintenance over time. Many flagpole installation problems stem from a small set of avoidable errors. Being aware of these before you start saves significant time and cost: Once the pole is up, the truck and halyard require periodic inspection to ensure the flag continues to fly correctly and safely: A well-maintained flagpole with a quality aluminum shaft and properly installed ground sleeve can last 20–30 years or more with only minor hardware replacements along the way. The truck, halyard, and snap hooks are the components most likely to need periodic replacement — the pole shaft itself rarely fails under normal conditions.The Ball on Top of a Flagpole: What It Is and Why It's There
What the Truck Does Inside the Flagpole
Choosing the Right Flagpole Ball Size
Pole Height
Recommended Ball Diameter
Typical Application
Up to 20 ft
3 inches
Residential, garden poles
20–30 ft
4 inches
Residential, small commercial
30–40 ft
5 inches
Commercial, municipal
40–60 ft
6 inches
Government, institutional
60 ft and above
8 inches or larger
Monumental, stadium, large civic
How to Put Up a Flagpole: A Step-by-Step Overview
Step 1 — Choose the Location and Check for Utilities
Step 2 — Dig the Foundation Hole and Set the Ground Sleeve
Step 3 — Assemble the Pole Sections and Thread the Halyard
Step 4 — Raise the Pole
Step 5 — Attach the Flag and Test the Halyard
Foundation Requirements by Pole Height
Pole Height
Minimum Hole Depth
Minimum Hole Diameter
Concrete Required (approx.)
15 ft
3.5 ft
10 in
1.5 bags (80 lb each)
20 ft
4 ft
12 in
2–3 bags
25 ft
4.5 ft
14 in
3–4 bags
30 ft
5 ft
18 in
5–7 bags
40 ft
6 ft
24 in
Professional engineer recommended
External vs. Internal Halyard: Which to Choose
External Halyard Poles
Internal Halyard Poles
Common Mistakes to Avoid When Installing a Flagpole
Maintaining the Truck and Halyard After Installation
Recommended products
-
2023 New Cheap Plastic Pipe Multiple Colors And Sizes Custom Hand Waving Flagpole
-
Wholesale Custom Pvc Material Indoor Desktop Flagpole Hand Waving Flagpole
-
Customizable Size Custom Logo Plastics Hand Waving Flagpole Big Pvc Flagpole
-
Plastics Hand Waving Flagpole Factory Direct Custom Wholesale PVC Flagpole Parts Pipe
-
Custom Easy Install Safety Flagpole Pvc China Factory Hand Waving Flagpole
-
New Popular Product Transparent Pvc Flagpole Custom Size Hand Waving Flagpole
-
2023 High Quality Hand Waving Flagpole Big Or Small Flagpole Size Custom
-
Fast Delivery Promotion Factory Wholesale Flagpole Pvc Pipe Hand Waving Flagpole
-
2023 Personalized Custom Desk Hand Waving Flagpole Outdoor White Flagpole
-
Wholesale 2023 Hot Sale Used Flagpole Weight Custom Pvc Hand Waving Flagpole
-
Wholesale Products Cheap High Quality Hand Waving Flagpole Newest Sections Flagpole
-
Wholesale Cheap High-Quality Hot Sale Flagpole Cylindrical Hand Waving Flagpole


Follow Us:
Copyright © Tongxiang Guangyu Plastic Products Co., Ltd. Rights Reserved.
